The Flying Wing Experiment
In the process of making the plug for my "J-45" design, (See "Projects" page) I had to build some wings and tail surfaces, to check alignment with the plug. Until it's done, I have no further use for them. Sometimes "stuff you have laying around" is the mother of invention... I've always wanted to build a "flying wing" type of model, but never got around to it
This is what I started with:
Some unexpected time off
Some nice pattern-style wings (Eppler 168 - symmetrical)
(Yes, I know that a flying wing should probably have a semi-symmetrical, reflexed wing, but what the heck!)
Some scrap balsa, foam, epoxy, glue, radio, etc..An OS .40 that runs great, loaned to me by a brave friend, for this experiment
Some research information from the internet on flying wings
The concept that this was probably a one-time deal, and so I wasn't going to get too fancy.
(It's structurally sound, and carefully aligned, but otherwise sloppy. This is the "just for fun" part of the hobby.)
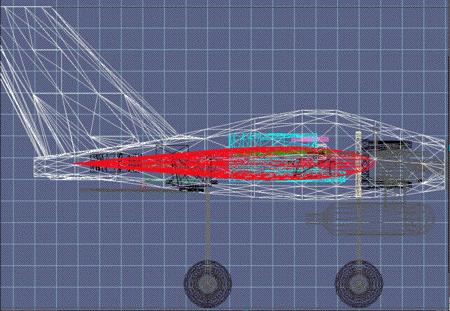
First, as usual, I made a simple computer model of the thing. Here are a few images:
![]()
My original plan for where everything would go.
The Stats:
|
Overall Length |
28 inches |
|
Wing span |
52 inches |
|
Wing Area (Root 14 in/Tip 7 in) |
546 sq. inches (MAC 10.5 inches) |
|
Flying Weight |
Approximately 5 1/2 pounds |
|
Wing loading |
Approximately 23 ounces per square foot |
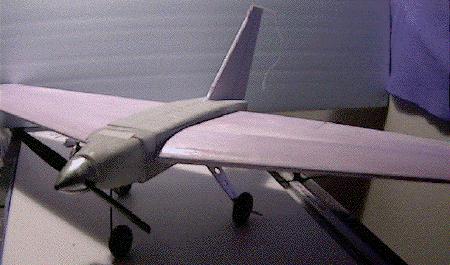
To keep it simple and inexpensive, I decided to use the "lost mold" method and make a simple fuselage out of blue foam, which I then fiberglassed. The only thing installed in this foam block was a fiberglass socket for the plug-in wing tube to seat in. I did this to save alignment headaches later. On a tailess design, the CG has to be more forward than normal, (15 to 20% MAC) so the fuselage had to be planned around the already-existing sockets in the wings. (The tube couldn't go through the tank!) Next, I cut out a top hatch, and dug out all the foam from the interior, installed a firewall, landing gear mount, and a couple of simple formers. Here's what the fuselage looks like. (I'm not going to paint it... I barely even sanded it!) The cowling is just taped on, in this photo.
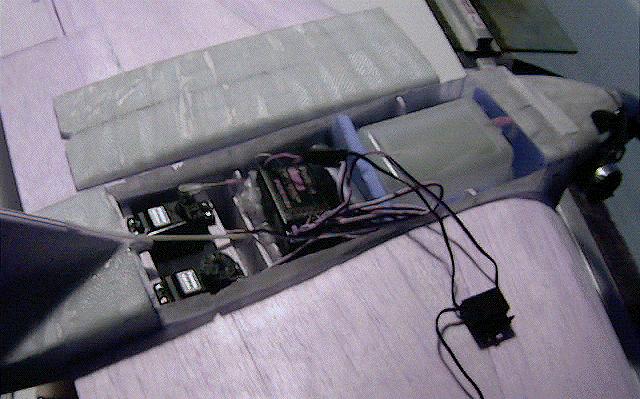
The 7/8 inch aluminum wing tube, which plugs into sockets in the wings, runs behind the 12 oz. tank, just in front of the receiver. The yellow nyrod going to the vertical fin's leading edge is an antenna guide, which passes through a notch in the hatch. The rudder/nose wheel steering servo is at the left rear. The throttle servo is at the right rear. The battery pack is under the receiver, and the switch isn't installed yet. (Futaba T6XA PCM for control)
The fuselage itself is only 16 3/4 inches long, from firewall to "stern". The vertical fin extends rearward a bit from there, and the engine cowling extends 4 inches forward, so the overall length of the whole thing is 28 inches. It's short! It works out with exactly enough space, and no more, as you can see from the photo above. I decided early on to forget about a canopy, and just fly the thing. The main landing gear is your typical bolt-on type that I had laying around from a previous plane, and the nose gear is a simple sport-type that goes through the center rear of the engine mount. The wings and tail surfaces are glassed with 3/4 ounce cloth, but I probably won't paint them, until I get it back on the ground after a few flights. (!)
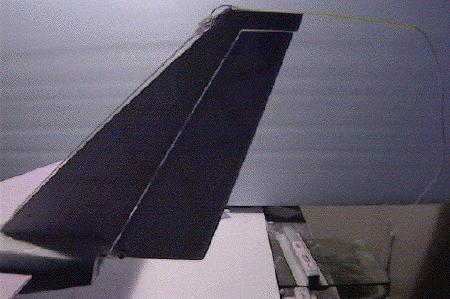
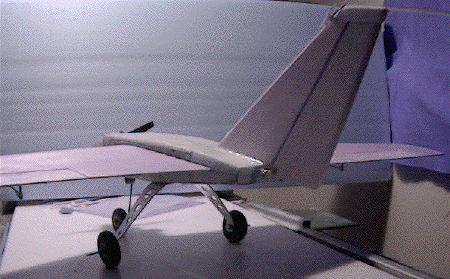
Vertical fin was built from sticks, then sheeted with 1/16th balsa. A piece of nyrod epoxied to the top of the fin keeps the antenna from dragging on the ground. (short fuselage!) Since I'm not covering or painting this one, I'll seal all the control surface gaps with silicone.
There are 4 servos. One servo in each wing, one servo for rudder/nose wheel steering, and one for throttle. Control is via elevons. To start with, I'm using 50% "aileron" differential to cut down on adverse yaw. I've located the CG at 15% MAC for the first flights, and have set up dual rates and exponential both, to (hopefully) keep me from over controlling it on the first flights. I've read some articles about stalled flying wings, and don't want to experience the "tumble of death"... at least until I get the thing to a recoverable altitude. The wings are set at zero degrees incidence., since they're symmetrical. I didn't use any right or down thrust on the engine. The 12 oz. tank sits on the 15% MAC line, which is the CG for initial flights. I expect to move it back to about 20% MAC eventually, but the only way to do that is to add tail weight, or use a smaller tank.
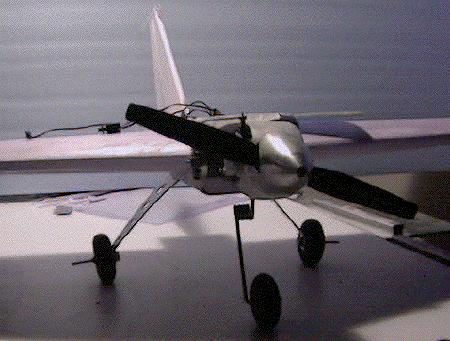
View showing the simple landing gear installation, with the muffler removed for clarity.
I'll trim off some of that excess axle on the mains.
Rudder pushrod exits through the rear of the fuselage. The one place I didn't remove the foam from the interior was in the tail. This gave me some (needed) tail weight, and gave a firm surface to epoxy the vertical fin into. I used epoxy mixed with milled fiberglass, and also made a fillet at the fuselage/fin junction, for a firm grip. It's solid
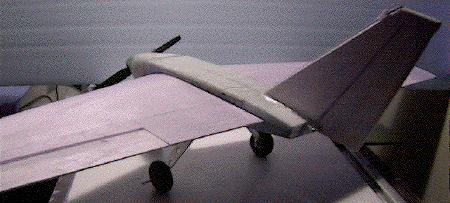
Looks pretty "slippery". I'm thinking it'll be fast!
First flight September 9th went without a hitch. The plane tracked well on the ground, took off smoothly, and climbed to a couple of hundred feet with no bad qualities. There I turned, looped and rolled it with no "scary" results. An unusual rattling sound caused me to abort this flight early and land. Landing was also smooth, with no problems. The rattling sound was a slightly loose spinner backplate, which I tightened up.
Next flight began the same way. At what looked like a normal speed, compared to the earlier flight, the model rolled over on it's back at about 50 feet and flew into the ground before I could correct it. It didn't look like a stall/spin, but I can't be sure, since it happened so quickly. The engine was damaged, and the fuselage broke just behind the firewall, but otherwise, no major damage. Oh well, we all know that if you fly these models, you will eventually crash one once in a while.
If I build another one, it will be more of a delta shaped planform, and instead of sheeted foam wings, I'll use a light built-up structure with full-span elevons. For the time being, I'm on to more traditional aerobatic aircraft, including my own "J-48" (See Projects page) and the other scale projects I'm working on.
Have fun! - Mike James
The very simple drawings I used to cut parts were scaled up from images like this one.
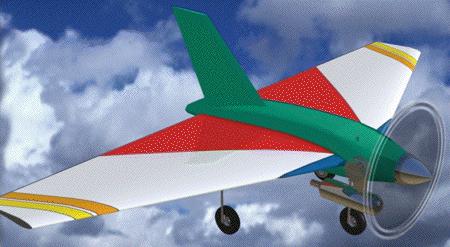
And finally the standard "in flight" image, with the revised fuselage shape
Later, I decided to forget the canopy, and move the throttle servo to the rear.
A side view, just to make sure everything fit in the tight space.
When I eliminated the canopy, I simply moved the tank downward.