Simple female mold for a NACA inlet
(Used on the "Eliminator 2" sport jet)
The procedure below could be used any time you want to make a simple one-piece female mold. Here, I've made a male plug for a NACA inlet, and are going to make a female mold. (There will be an inlet-shaped cutout in the fuselage, and the piece that comes out of this mold goes on the inside of the fuselage.) Since the molded parts will be epoxied or siliconed to the inside ot the fuselage, I've intentionally created a flange with a rough surface. Later, this will create a better bond for the glue. Our parting board was made of 1/8" plywood. For your reference, this plug is about 8 inches long.
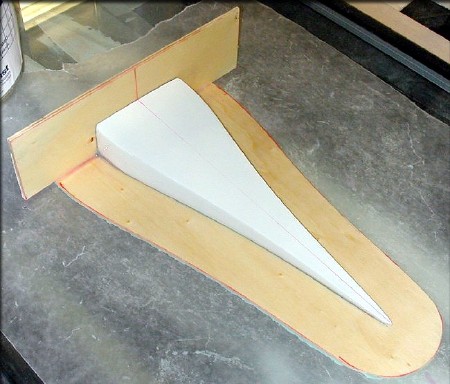
A simple frame was made out of lite ply, and sanded moderately smooth.
To insure that nothing moved, the plug was tack-glued to the frame with a couple of drops of CA
Then, the whole plug and frame assembly was given several coats of Partall wax, and a coat of PVA.
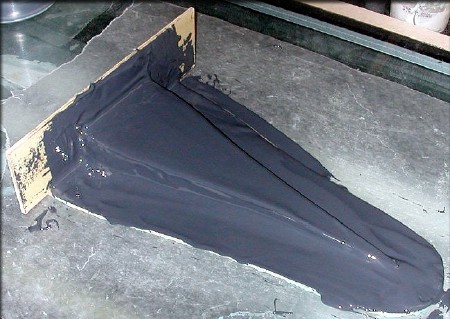
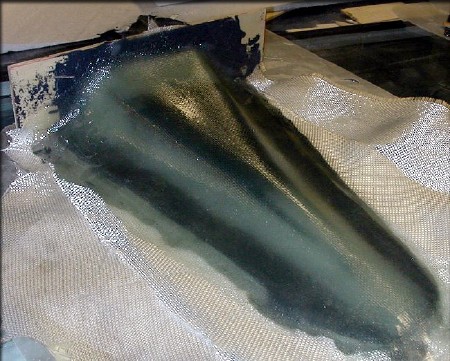
After the wax and PVA had dried, the whole assembly was given a coat of tooling resin.
I use Ist Systems #1099, pigmented black, in this case.
This was alloId to tack in for about 90 minutes, before the next step.
This inlet has some sharp corners, which would be difficult to drape cloth around.
So the next step was to add a thick fillet of epoxy/Cabosil around all those corners.
This was alloId to tack in for about 90 minutes before the next step.
The reason I wait 90 minutes is so that when the cloth is applied,
I don't distort the tooling resin or epoxy/cabosil when I start to add layers of cloth.
The rest is pretty simple
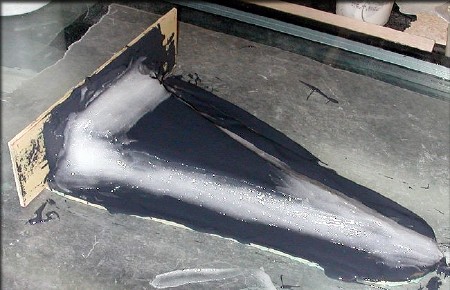
Again, I start by placing small bits of resin-saturated cloth in all the sharp corners,
so the larger pieces of cloth drape more easily, and I fill all the voids.
I're gradually increasing the size of the cloth pieces as I go, as the corners become rounded,
and also laying the cloth at various angles, to get the maximum strength and rigidity in the mold.

The last layers of cloth are the largest, which makes the mold a lot less "prickly" to handle when it's cured.
Total mold thickness in this case was about 3/8".
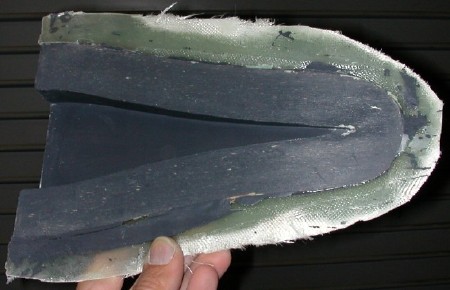
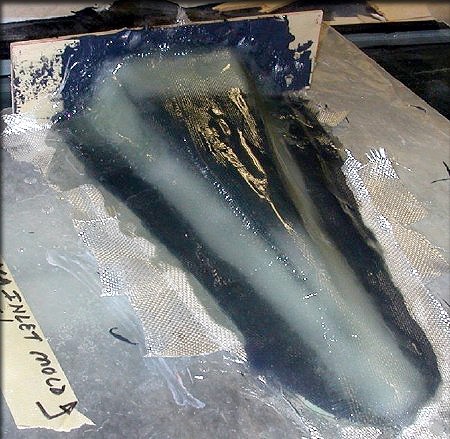
The finished mold, just after pulling the plug.
It will be trimmed back to the black area, leaving a 3/8" flange for gluing.
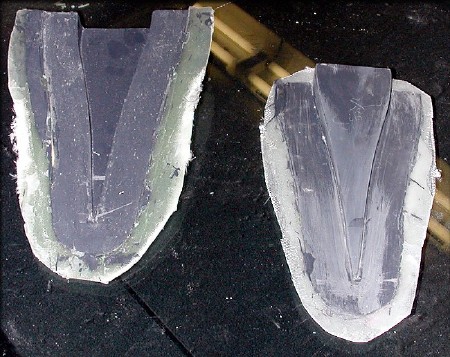
This female mold works, but after some thought, I realized several things...
First, if I Ire to use a male form instead, the "shiny" side would be the one visible on the outside, and makes more sense aerodynamically too, since the air has a smoother surface to flow over. Also, when the part is made over a male form, it allows the addition of a fillet in the part, to strengthen it, and leaves the rough side where it should be, as a gluing surface. So, using our female mold, I used tooling resin to build a male tool, and that's the one I'll use on the actual aircraft. Live and learn!
(Used on the "Eliminator 2" sport jet)