Years after this article was written, I created a detailed, 3D scale model of the F-22. You can view the article here, and the finished 3D model is available in my 3D Catalog.
Choose your model
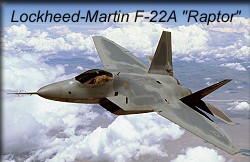
Although I still enjoy almost any kind of flying, I'm leaning more and more toward precision scale projects. They're a challenge, and they're rewarding. One of the questions I get most, related to producing either paper or CAD plans, is on the subject of using a plastic display model to help create them. There are a variety of ways to do it, and I'll illustrate several of them in this article, using the Lockheed Martin F/A-22 "Raptor" as the example. I actually started to do the YF-22 when the program began, and got as far as exterior drawings, so this plane is familiar to me.
The process of using a (good quality) plastic display model to create plans is really quite easy, and doesn't require massive computer power, or laser scanning. (although both of those are nice things to have) What we're going to do here is create a number of accurate cross sections, which can be scaled up by tracing them onto graph paper, or by scanning them into the computer for scaling and printing. The way to achieve this is to slice the completed model up using a simple band saw.
In some ways, this method is even better than laser scanning a model into 3D software. Here's why:
If you trust that the position of the plastic model's ducts, weapons bays, landing gear bays, and other interior items are accurate, then the bonus you get from these physical slices is that you can trace all those interior parts too. That's a very handy addition to your drawings, even if you alter them later.
The process isn't too different from the standard method of building a plastic model, except that we're going to fill it with urethane foam. Why? Well, I've done this before, with a plastic model built in the normal way, and although it's possible, the slices are very fragile, and pieces tend to fall apart. The foam we'll use adheres well to the plastic, and solidifies the interior. That way, when we slice it up later, the parts will stay together, and the slices won't be so fragile.
I've followed the YF-22 program since it's beginning, and have always thought this was a beautiful airplane. To be clear: I'm going to show several ways to make a precision model, using the F/A-22 as the example, but only up to the point of making drawings. I don't intend to actually make a large F/A-22. (But you can, and I hope you'll send me photos of it when you're done!) Also, since I'm going to focus on the measurement and scaling aspect of this project, it won't be a full-blown "Everything you wanted to know about the F/A-22"-type of article. Without getting into micro-details, let's assume that the Revell model is perfect, and that we've already done some research and determined that it's our best source of physical information, aside from measuring the actual F/A-22. Since I have no intention of building an actual F/A-22, the materials on this subject are just what you see here. I did not make any larger drawings or full-size plans.
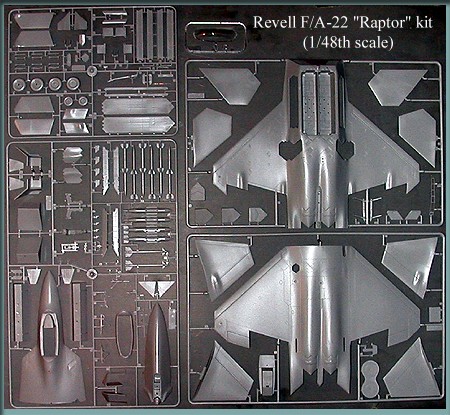
Here are all the parts included in the kit, except for the manual and decals.
The first thing you'll notice is that this kit, like many military models, includes a lot of parts for missles and bombs. For our purposes, they are not needed, so the first thing I'll do is separate all those, and put them back in the box. To keep the parts from being lost or banged up, I'll leave everything else connected to the plastic "trees" until we're ready to use them.
The general specifications of the F/A-22 are widely known, so the first task will be to verify that these overall dimensions are correct in the model. It's best to do this now, so you're not surprised or frustrated later. After checking all the major dimensions, such as length, span, various root and tip chords, etc., I was pleased to find that this model is quite accurate.
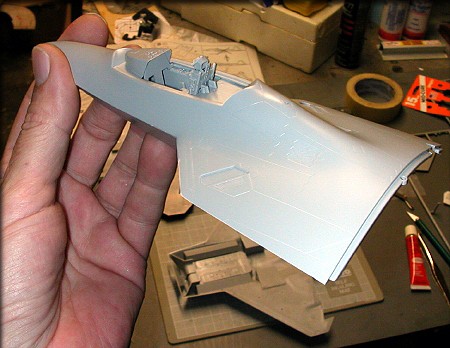
After building so many large RC models lately, I was reminded just how small some of these parts can be. Take a look at the cockpit assembly above, next to a dime, for scale reference. I use tweezers to handle small parts, some very small X-Acto clamps to hold parts in place, and I use a piece of piano wire to apply glue to parts. (Toothpicks work well for that too.) First, I squeeze a drop or two of glue onto the scrap of waxed paper, then I use the wire to actually pick up and apply the glue. It's almost always a mistake to try and squeeze glue from the tube itself.
The cockpit tub has been glued into the upper fuselage, and fits well.

The cockpit tub and nose gear well occupy most of the central nose section.
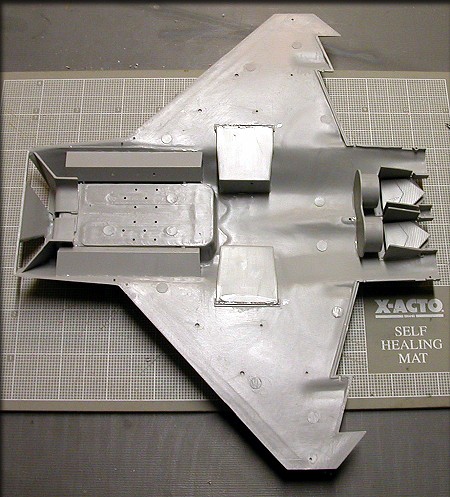
Landing gear bays, weapons bays, intake "ducts", and exhaust parts are installed in the lower fuselage.
I'm assembling all the major modules, but will not connect them just yet. You'll see why on the next page.
If you're going to build a scale RC model of a plane like this, you'll begin to see two things... First, notice how much space the interior items take up, and where that space is taken up. Second, notice how the openings in the fuselage (the side that's against the work table, in this photo) affect the structural integrity. You may as well give some thought now as to where spars and landing gear mounts need to go. A nice feature of this kit is that it includes separately-molded ailerons and flaps, so you can see where trailing edges and hinges should go. Of course, if you're using ducted fan or turbine power, then you have to consider ducting too.
I've installed these interior "bay walls", even though I don't intend to leave the bays exposed later. I've also built and installed the cockpit section, although it too, will be filled with foam. I did that so that when this model is filled with foam and cut up, later, we'll be able to see the interior structures in the "slices". That can be handy when making your drawings!
This kit is fitting together well so far. The joint where the nose section connects to the main fuselage has been done sloppily on some other kits, but this one is nice. I test-fit everything before I glue it, and the match is really quite good. Revell has steadily improved their kits over the years. The exterior surfaces even have the "satin" finish, representative of the actual F/A-22.
Click the "Measure & Cut" link below to continue.
Choose your model | Measure & Cut | Create the plans