Construction Article and Review of "Extase" (Pronounced "Ecstacy")
Construction and test flights completed! - Updated: 06-16-02
At the top of the building instructions I received, it says "This model is designed for experienced pilots." I suppose that the pilot flying the "Extase" should be aware of at least the major things, like the fact that the obviously-huge control surfaces are more powerful than a typical sport plane. Aside from that, I don't think that any modeler who has flown half a dozen airplanes would have any trouble with it. As you'll see in the "Trimming & Flying section, it is very stable.
In terms of the kit assembly itself, that "experienced pilot" comment simply means that some of the pre-drilling and pre-mounting you may find in a "sport" kit have not been done with this one. The things you must figure out for yourself are the engine and cowl mounting, drilling of holes in the wing for the wing bolts, (checking the wing alignment as you do it) the drilling of some holes for the fuel tank plumbing, etc.. If you've built a few kits in the past with similar setups, you won't find any of these things a problem. When you consider the wide range of engine and radio setups that are possible for a kit like this, designed for 3D flying, you may think that these choices left to you are an advantage.
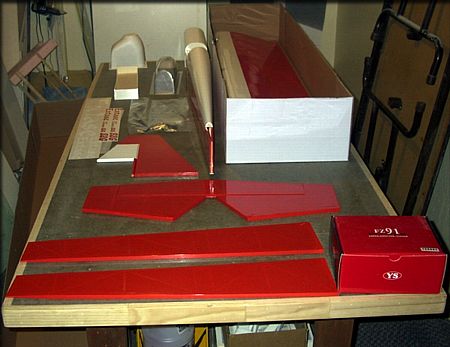
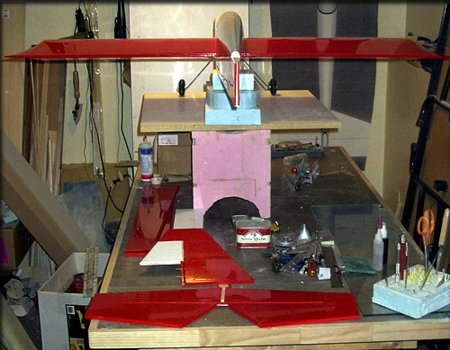
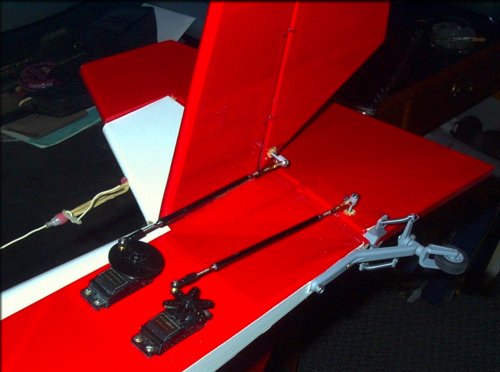
Those huge things on the table next to the engine box are the ailerons!
Here's the kit. As you can see, there isn't much work left to do. I do a lot of long-term, big projects, and it's kind of nice to open a box and realize that you could be having some fun with this aircraft in just a few days. I haven't built an ARF in years, so this is almost like a "vacation".
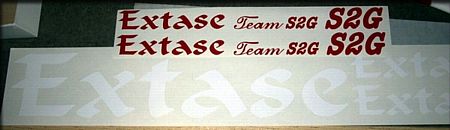
Here are the FasCal markings included with the kit.
One other reason that this might be considered "for experienced modelers". That is, (and I feel compelled to keep saying this) that the model is VERY light! This is a great attribute for flying, but it does call for some special handling. It's a somewhat delicate airframe, and you should be careful how you handle it around your shop. It's strong where it needs to be, but LIGHT everywhere else. Be careful when gripping the leading edge sheeting, for example, because it's contest grade balsa, and is easy to break. (It's quite strong enough in tension and compression though, for the expected flight loads.
Because I'm using a YS .91 4-stroke engine instead of the recommended .60 2-stroke, I considered the addition of some triangle stock or other reinforcement around the firewall. Ultimately, I thought this would make a better review and test of the airframe to NOT do this. Having now flown it for a whole day, I can tell you that the structure is quite strong enough, just as it comes from the factory. If you keep in mind that this airplane is designed for 3D flying, and won't be experiencing high speeds and extreme G loads, you can appreciate the designer's efforts.
A word about structures and strength...
It's important to actually engineer structures, and not overbuild them. This kit was engineered, for "3D" and "Fun-Fly" style flying. If you put a big engine in it, dive it a high speed, and put a lot of high G loads on it, you can probably break it. That's true of any plane, so it's certainly not a "defect". If you have doubts about a particular part of the structure, it can easily be strengthened without adding much weight. The way the tail parts attach is one example of this. If this joint worries you, then simply drill a few small (1/16th inch) holes through the tail parts, into the fuselage, and insert a few toothpicks, with a drop of CA or epoxy. A simple thing like that adds almost no weight, but adds enough additional strength for those of you who may be a little heavy-handed on the sticks. For my own piece of mind, I added a bit of 3/4 inch triangle stock under the stabilizer, where it meets the fuselage on both sides, and sanded the forward end to an aerodynamic shape.
Most of the really difficult work, like the very nice truss-style ribs, is done for you, and this is a quality, light ARF.
I started on construction 05-31-02, and was very pleased. Since the kit is an ARF, with only hinging, drilling, engine and landing gear mounting, and radio installation remaining, I intend to use only epoxy, and no CA. I prefer a silicone-type adhesive for attaching the canopy. The only servo mount you need to install is for the throttle. The tail already has mounts installed for the rudder and elevator servos, and the wings already have their servo mounts installed. ...Nice!
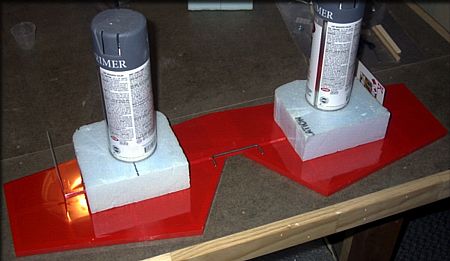
I've used foam blocks to protect the structure while I hold it down.
The playing cards are spacers to establish the clearance between the stabilizer and elevator.
I installed the elevator joiner rod, (above) and while the epoxy was curing, installed the single dowel in the leading edge of the wing, which fits into a hole in the tank compartment former. The hole for this dowel is already drilled in the leading edge, so alignment is easy. Then I cut away a small 1-inch diameter hole in the top surface of the wing center sheeting, to allow the servo wires to exit. (This kit uses one servo in each wing.) It's easy to fish the servo wires through this wing, since the ribs are all truss-style, and not sheet stock
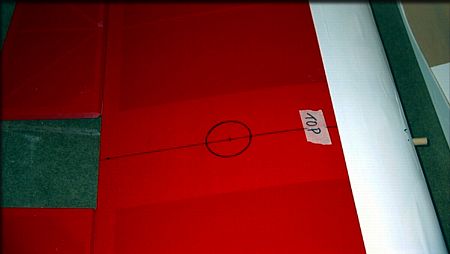
The circle marked here is the area I cut out for the servo wires.
I drilled the holes in the wing for the wing hold-down bolts, and verified that the alignment was correct. I made the small modification of adding a small 1/64th plywood plate to the bottom of the wing, to better spread the load from the bolts. The kit comes with metal wing bolts, and they fit into pre-installed blind nuts in a plywood plate in the fuselage.
After marking some centerlines on the firewall, I drilled the holes for the engine mount. I'm using a YS .91 4-stroke on this model, and used a Dave Brown "90FS-9004" mount, with the engine inverted. To be sure that I got it the right height to match the spinner portion of the cowling, I used a very simple method. The cowling is a pretty snug fit on the fuselage, and matches it's shape, so I simply slid it onto the fuselage, and drew a line from the center of the spinner area to the fuselage. I then removed the cowling, extended my mark onto the firewall, and aligned my mount. With such a large engine for this ".60-size" plane, the top two engine mounting bolts slightly intruded into the foam in the upper forward turtle deck, just behind the firewall. I simply removed enough foam to allow the installation of blind nuts, and will coat that area with epoxy when I give the tank compartment some fuelproofing. See the images below.
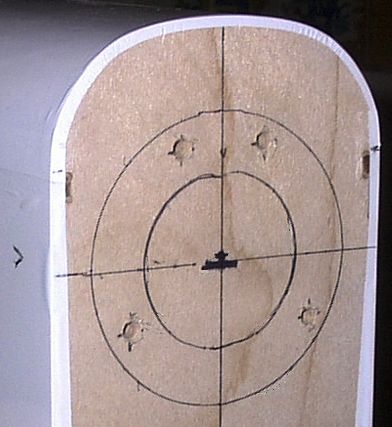
Notice my mark on the fuselage side, which I then extended onto the firewall, to find the correct location for the engine mount.
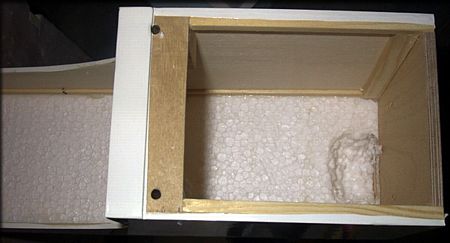
I've removed a little foam from the upper forward turtle deck, to allow installation of blind nuts.
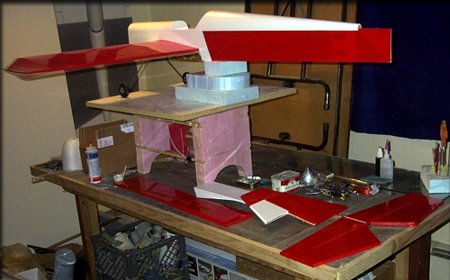
I've installed the main landing gear, mounted the wing, and propped the plane up.
This way, I can check the alignment as I mount the stabilizer and vertical fin.
Here's another shot, ready for tail assembly. The engine and tank have been test-fit, and all hinges have been test-fit.
On 06-01-02, I finished the tail assembly, installed the fuel tank, and began test-fitting the radio gear. I'll be using short carbon fiber pushrods for the elevators and rudder, with the servos mounted in the tail. The whole plane will be equipped with Rocket City ball-link hardware, for extra stiffness and vibration resistance. I chose to install a Sullivan 10 ounce "slant-type" tank, then later switched to a larger Great Planes 12 oz. tank. ...More air time!
Alignment was a breeze. All the parts fit perfectly, and no shimming
or other corrections were needed to get everything straight.

It's starting to get pretty now.
All that's left is the radio installation, balancing, and engine test-runs.
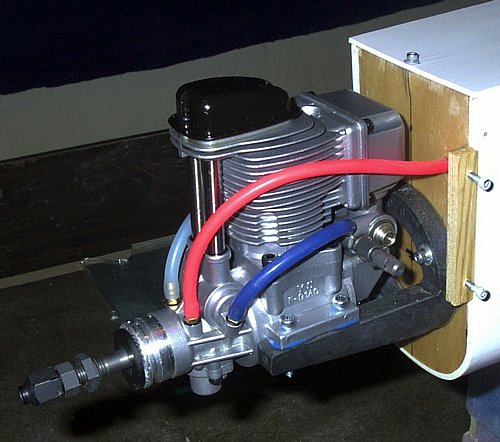
Here's the installation of my new YS .91 4-stroke, after bench running.
I added some small hardwood blocks to support the cowling, since this engine
sits further forward than the specified .60 2-cycle would.
I made the tank hatch removable, rather than gluing it on.
Servos for the tail installed, along with a (Goldberg) tailwheel assembly.
For control horns, I used dowels, glued into the tail surfaces, and a 6-32 screw with an
aileron-type connector, for a little extra solidity.
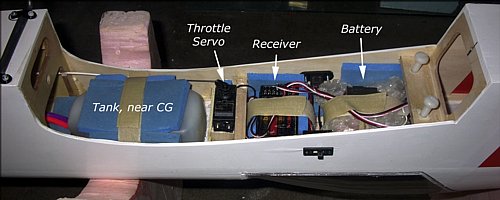
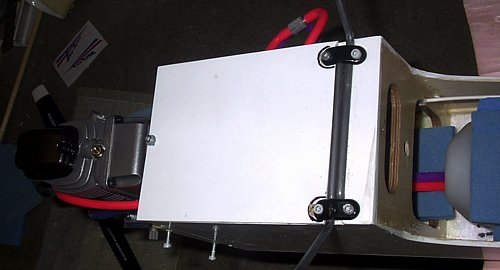
Here's the radio installation. (The nose is to the left.)
Velcro, secured with silicone, is used to hold everything down.
Notice that the tank is mounted rearward of the usual position, for balance.
The battery was also placed at the rear of the compartment to aid in balancing.
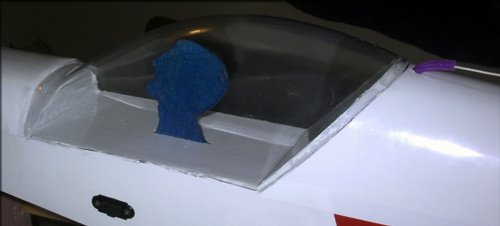
I wanted to have a pilot, but also wanted to keep the plane light, so
I cut a profile out of balsa and painted it. The canopy is secured with silicone.
Finished weight, with fuel, is only 6.25 pounds!
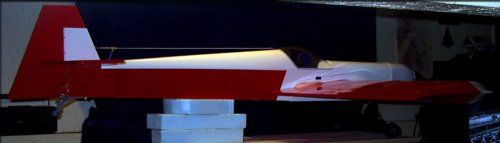
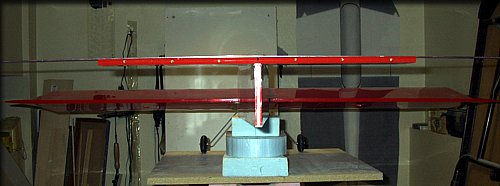
The side view presents itself like a Pattern plane.
This long moment arm pays off in flight, making maneuvering smooth.
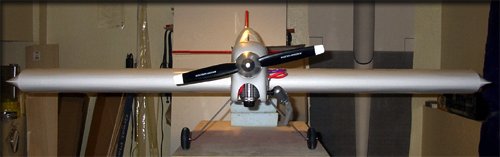
The front view shows the very thick main wing section... Great for 3D!

Ready for flight!
The model balanced properly with no extra weight needed. ..Very impressive, showing that even with a large engine, the design allows for positioning equipment as needed. After switching to a larger tank (12 oz.) and switching from a 14/8 prop to a 15/6 prop, I found that the "Extase" needed 2 oz. of lead added to the tail to balance at the factory-recommended point, which is 150mm (5.9 inches) back from the wing leading edge. Quite acceptable. I should also mention that throughout this project, I never found a warped or inaccurate part, and that when I finished the assembly, the plane balanced perfectly, laterally, with no weight needed. This a well-engineered kit, built very carefully, which results in a great flying airplane.
Successful test flights today! (06-16-02)
Check the "Trimming & Flying" link below for photos and info!
>>> Mike James
Kit Overview | Construction | Trimming & Flying