- Design
- Development
- Simulator Tests
- Construction 01
- Construction 02
- Construction 03
- Construction 04
- Construction 05
- Construction 06
- Construction 07
- Construction 08
- Construction 09
- Construction 10
Construction 03
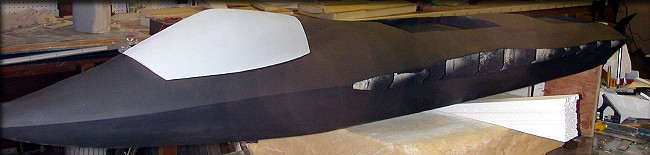
After some more filling and sanding, the plug is currently in black primer.
(Still waiting on the wing and stab tubes before closing up the fuselage sides.
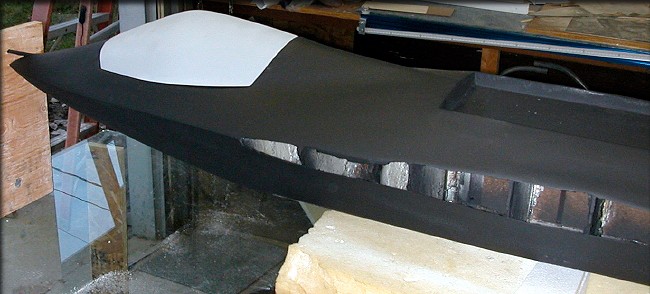
I'm especially happy with the nose/canopy area. It's very close to it's final shape now.
The blending looks good, and I'm anxious to get the wing and tail parts attached and aligned.
I'm still working on a component of my experimental LEF (Leading Edge Flap) design for the wings, too. More info on that later.
Alignment made easy
Most assemblies were built on 3/4" glass, supported evenly around the perimeter, and checked with a variety of measuring devices. A flat level surface makes alignment steps like those that follow easy.
This airplane has a fuselage with blends with the wing and horizontal tail surfaces, like the FA-22 and F-35. At this point, the fuselage plug has been checked for symmetry, and sits level, on it's own, on our glass surface. Verify that by using a level in the hatch flanges, which were designed to be a builder's reference. (They are a zero degree reference, matching the thrust centerline of the plane.)
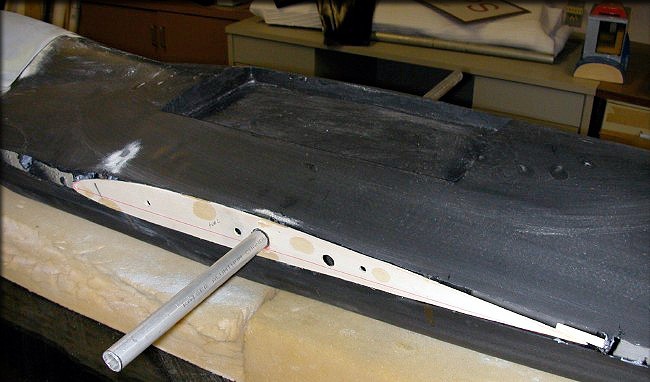
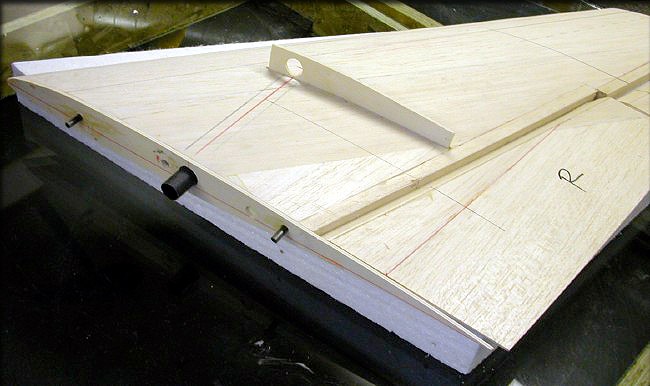
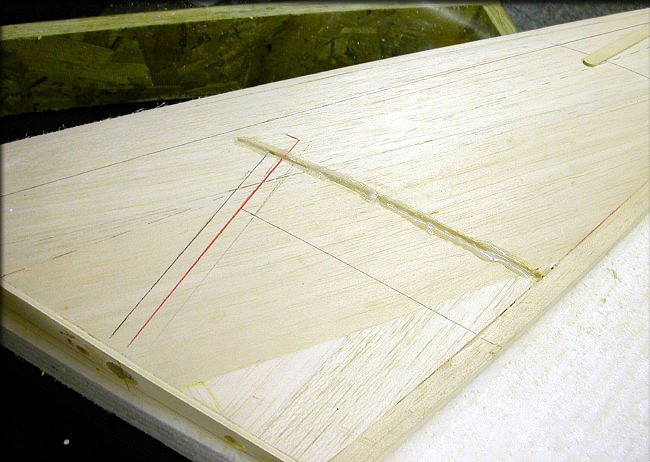
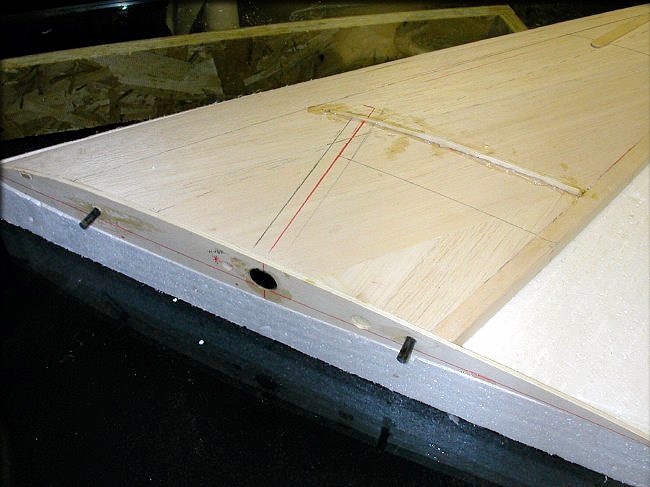
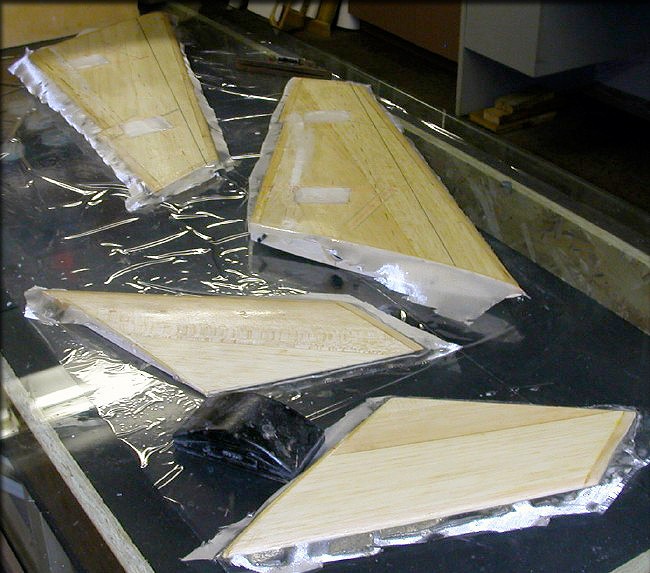
I've checked both sheeted wing panels to be sure that they match, and built two additional root ribs, which also match the sheeted wings. All the holes you see in the root rib are duplicated on the sheeted wing... That's one hole for the wing tube, two for alignment pins at the leading and trailing edges, one hole for routing servo wires, and one hole for the 1/4-20 bolt which will hold the wings against the actual fuselage later. Here's what we did...
Fuselage preparation first:
The wing sockets are NOT installed in the sheeted wings yet, but the holes are drilled, and the socket support rib is temporarily installed in a slot in the top of the wing. The socket which fits inside the fuselage plug is slid into place, along with the aluminum wing tube, but not glued yet. The extra root ribs, which will become part of the fuselage, are slid onto the tube, but not glued yet. I squared up the wing tube, so that in the top view, it's 90 degrees to the fuselage, and made alignment marks at the appropriate points on the fuselage and the fuselage root rib. Next, when I align the wing in the vertical axis and set it's incidence, I'll use those marks to insure that the wing tube stays 90 degrees to the fuselage.
The purpose of this next step is to lock the fuselage root ribs to the fuselage, which will set the incidence angle, and the wing tube position. Slip the wings onto the tubes, using their alignment pins, along with the wing tube, to align them with the fuselage root ribs. Attach an incidence meter to one wing. Simply hold the wing up against the fuselage, using a bubble evel to insure that the wing tube remains level. When the wing tube is level and the wing is at the correct incidence, tack glue the fuselage root rib to the fuselage with CA in several places. Carefully remove the wings, set them aside, and then epoxy the fuselage root ribs in permanently. Epoxy the wing tube socket permanently into the fuselage plug.
Then align the wings with their wing tube sockets and socket support ribs.
So, the wing incidence is now set in the fuselage root ribs, and I know that the wing tube is aligned vertically and horizontally. The only thing left is to "lock in" that alignment, by permanently gluing in the tube sockets and socket support rib in the wings. I did all steps for both wings at once, since I used slow-cure (12 hour) epoxy, and had plenty of time.
As described above, the fuselage root ribs are now set, and the wing tube is aligned.
The wing tube socket is sealed with a plug of 1/8" light ply, coated with epoxy.
This keeps the wing tube from gradually eating away more foam in the outboard portion of the wing.
When assembled, it fits through the root rib in the wing, is glued for it's entire length in the foam, and is epoxied to the socket support rib.
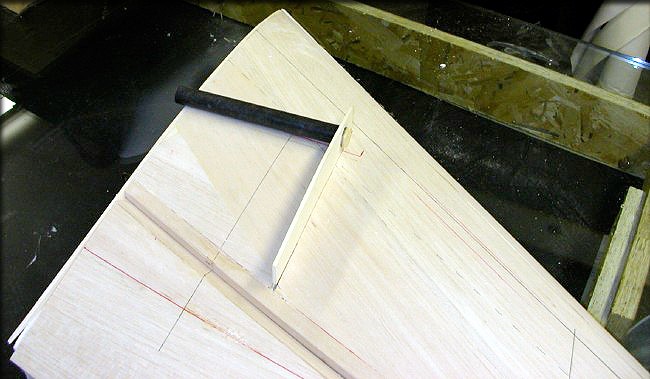
Here you get a little better view of the socket support rib, sitting loosely in it's slot,
and you can clearly see the tube socket and wing alignment pins in the root tib. (I used carbon tubes, epoxied into the root rib.
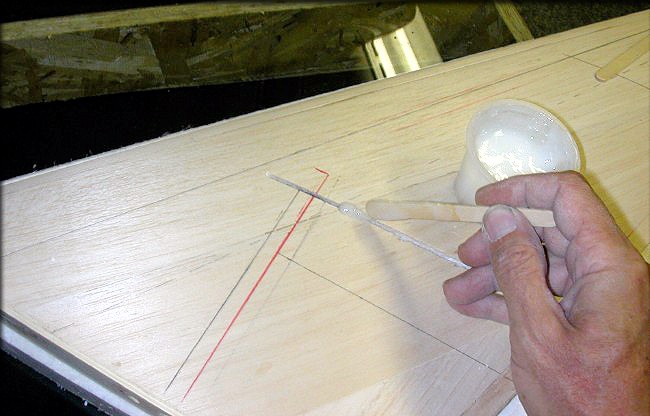
I made a thick batch of epoxy and Cabosil, just thin enough to sag slowly into the slot. (about the thickness of mustard)
I laid down a bead of this mixture in the slot, waited until it sank in, then ran another bead in.
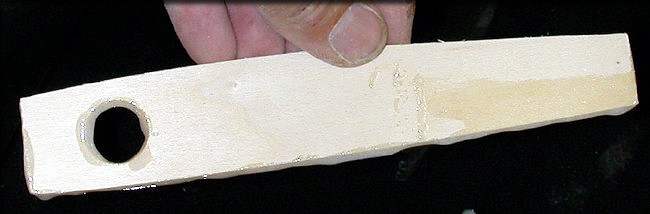
Next, I smeared the same epoxy/Cabosil mixture on the sides and bottom of the socket support rib.
I had already test-fit the tube and socket into this rib, so I knew it would all fit together.
The socket support rib is pressed into the slot, and wiggled up and down a bit, to insure even glue coverage.
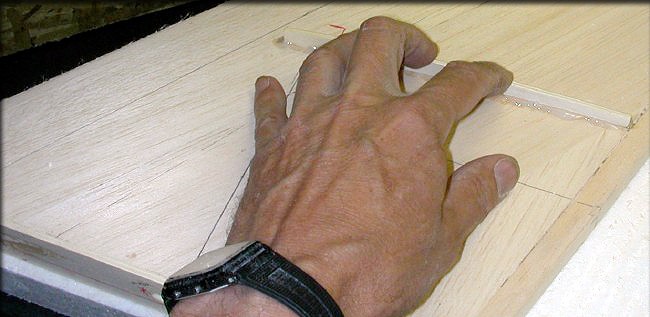
I leave a bit of the socket support rib sticking up, and will press it down as I insert the socket through it.
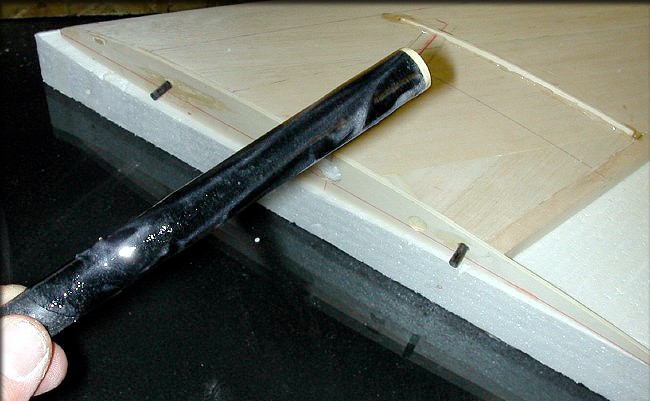
Using a gloved hand, I smeared the epoxy/Cabosil mixture all over the wing tube socket.
Insert the socket into the hole in the core, twisting it as you do, to insure good glue coverage.
Position the socket so that it passes through the socket support rib.
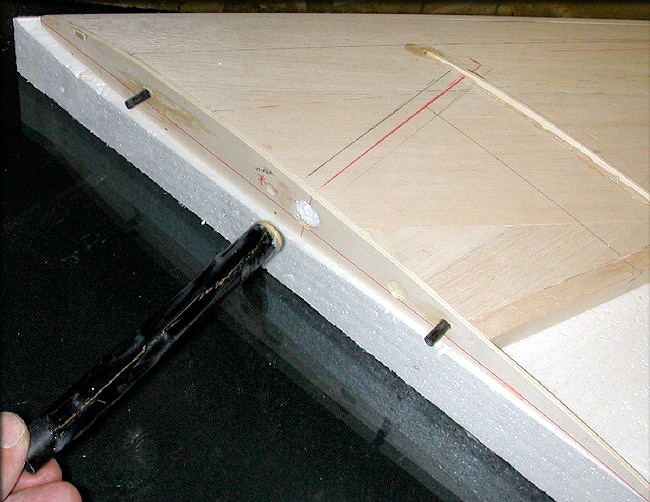
If you've measured evertything carefully, the open end of the tube socket will be flush with the root rib.
Wipe off all excess epoxy with a paper towel.
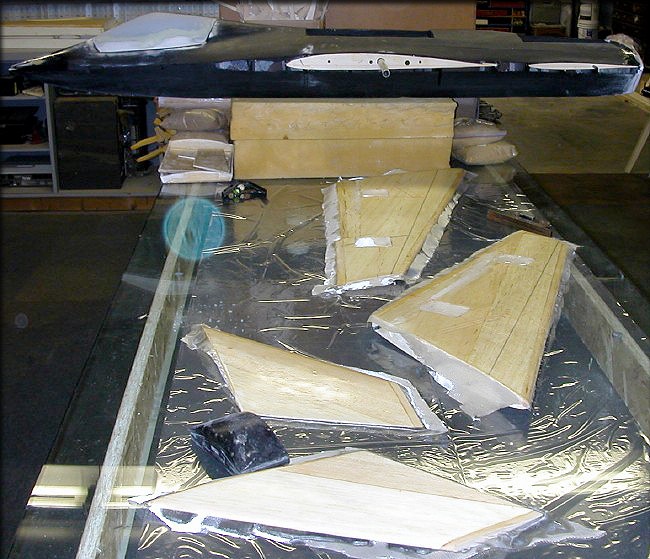
I was prepared to block up the wings, use tape, or whatever, to hold their alignment against the fuselage, but no "droop" or other alignment problems surfaced. Since I know the table is level, and that the model is level on the table, and that the wing tube and root ribs are aligned properly, all I have to do is stick the wings on the tube, and make sure that they stay flush with the fuselage root ribs until cured. This covers vertical/horizontal alignment, dihedral, and angle of incidence, all in one step. I simply checked both wings occasionally, and let the epoxy cure.
The next day, an even simpler procedure was used to align the stabilizer root ribs.
Since these function as stabilators, only the root ribs need incidence alignment.
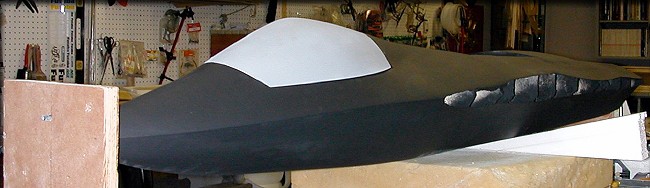
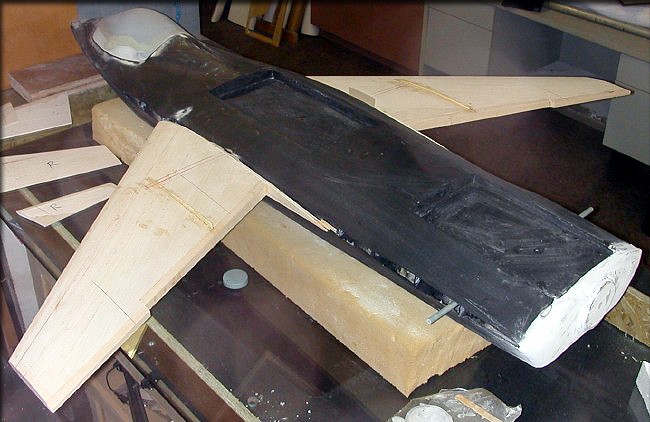
The dorsal fin under the vertical stabilizers will be molded, so at this time, I just have the one plug.
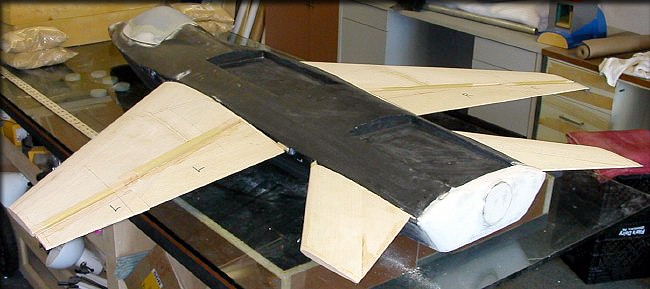
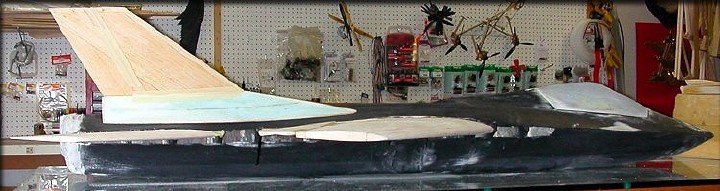
A side view looks good, but hides the fact that only one vertical fin is attached. Still... It looks good.
All major steps are complete, and I'm only left with the last cosmetic details in the fuselage plug, before mold making.
Production cores are intended to be glassed, so I'm glassing these too, before finalizing the fuselage plug shape.
That insures that all future production wings will blend properly with production fuselages.
The wing cores already have the servo wiring tube cut, and the servo hatch cutouts have been made.
Tomorrow, I'll finish these, then use them to finalize the fuselage plug shape. In the meantime, I'll be closing up the sides of the fuselage, and building the forward chine on the fuselage nose, and the hatches.
Click the "Construction 04" link below to continue...
- Design
- Development
- Simulator Tests
- Construction 01
- Construction 02
- Construction 03
- Construction 04
- Construction 05
- Construction 06
- Construction 07
- Construction 08
- Construction 09
- Construction 10