- Design
- Development
- Simulator Tests
- Construction 01
- Construction 02
- Construction 03
- Construction 04
- Construction 05
- Construction 06
- Construction 07
- Construction 08
- Construction 09
- Construction 10
Construction 05 (Final pre-molding finish work)
We attended the Jet Invitational at Triple Tree , (10-23-04) and wanted to thank those of you who came by and took a look at the plugs. And... That goes double for Bob Violett, of BVM Jets, who was kind enough to come by, have a look, and spend some time speaking with me. What a pleasure!
I'm still about a week or two from making molds, and there are several more steps to do, including marking the panel lines for the gear doors, ventral fins, and dorsals, canopy frame lines, etc..
I'm also molding in two root ribs in the rear of the fuselage, so that the vertical fin/dorsal assembly will seil-align when installed. Builders can have removable vertical fins if they like, with only a servo wire to disconnect. (Rudder servos are installed in the base of the dorsal fins, and the linkage is completely concealed, when installed.
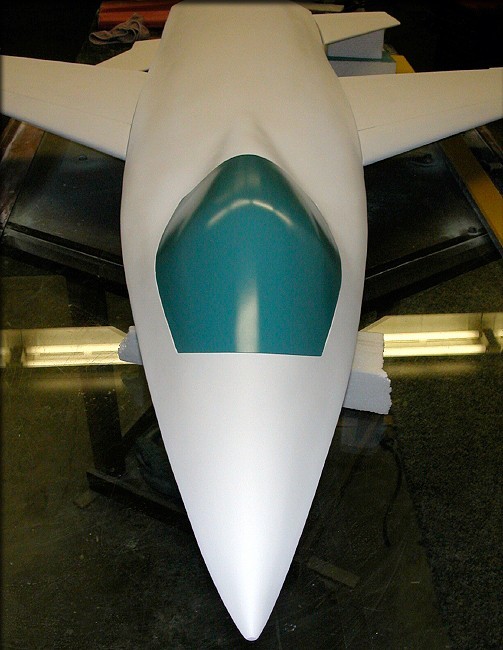
Starting to look like a mean machine...
Although not finished, the canopy plug/fuselage seam is looking pretty good. It's smaller than a piece of typing paper.
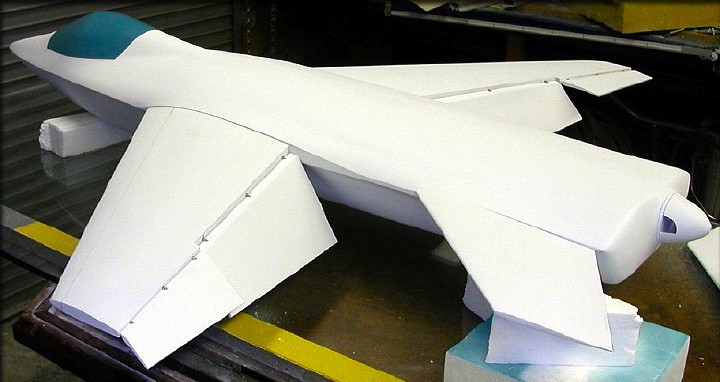
Here's the mockup, minus vertical fins. Everything fits!
Ok, so back from the show and back to work.
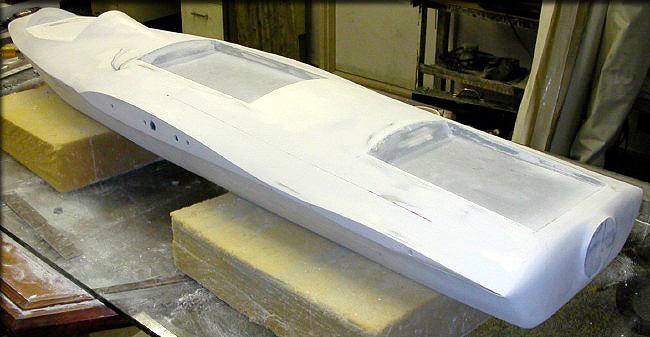
The fuselage received several final checks, sanding, filling, and alignment fixes. Looks good.

The fuselage main hatches. (front hatch on left, rear hatch on right)
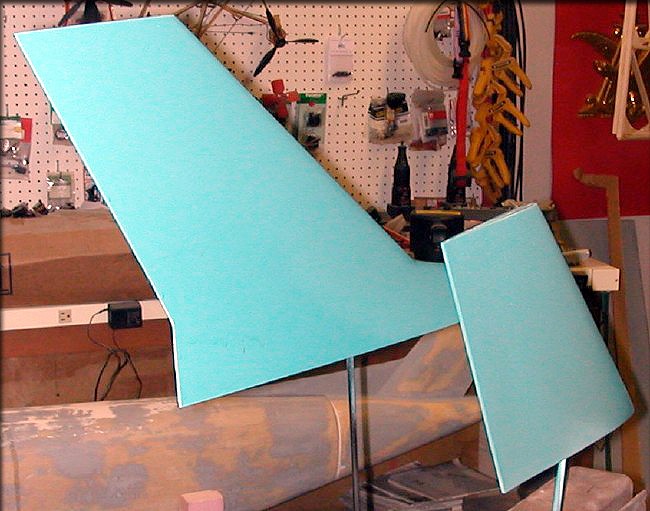
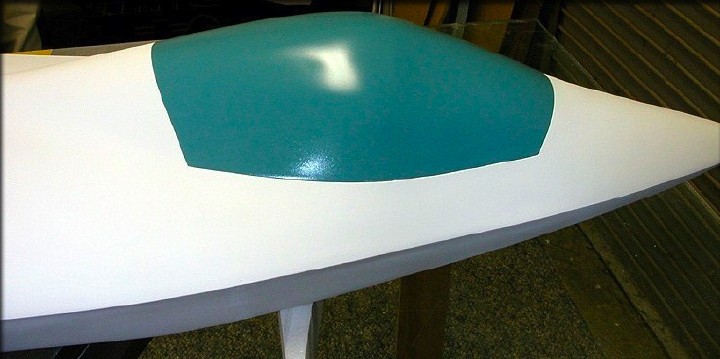
Tail surfaces and canopy plug were given a coat of engine enamel, as the final pre-mold finish.
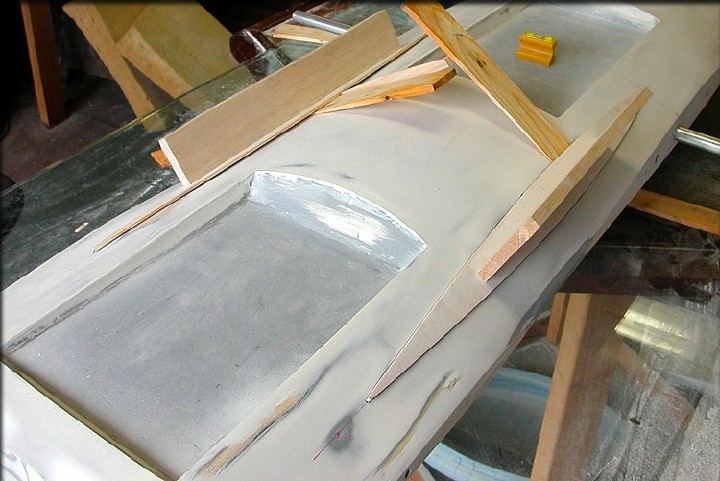
To aid in aligning the vertical fins, which can be attached permanently or removed, at the builder's discretion, two ribs were added to the top of the fuselage. These are slightly smaller than the base of the dorsal fin, so that when the fins are attached, they'll automatically align. A blade spar goes into the fuselage (on the actual model) and attaches to an internal former.
This presented a unique problem... The fuselage is not "flat" where the ribs attach, but has a lot of compound curves, blending the fuselage with the wings and tail. First, the alignment marks were made on the fuselage plug. Then the alignment ribs were coated with tooling resin, sanded, and fitted with a temporary block of wood along their length, to prevent bowing during the next step. Then, I used shims to tilt the ribs to the correct angle, and checked each rib's angle with an inclinometer. I tack glued the shims in place, and filled under the ribs with tooling resin. When cured, the shims will be cut away, and the area around these ribs will be sanded smooth. This will create raised ribs in the fiberglass fuselage, for aligning the fins.
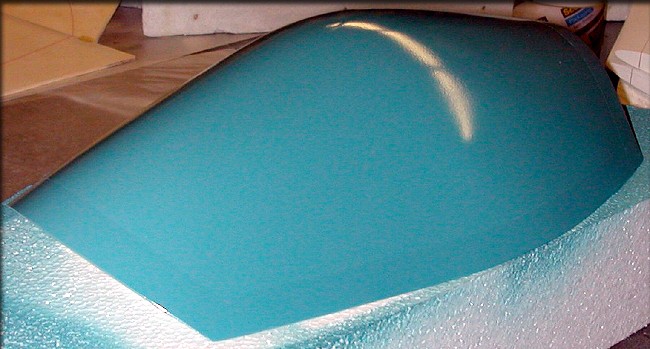
Very faint in this photo, but canopy frame lines have been created in the canopy plug. There are actually recessed, so that when I vacuum-form clear canopies on the same plug, the clear part will be able to fit in the fiberglass frame flush.
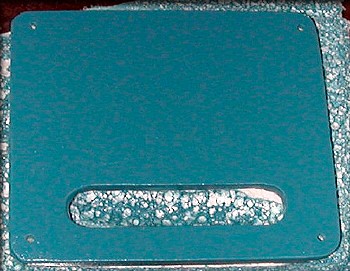
I'm working on a servo hatch cover plug too, so I can mold them for the kits.
Here's the first production mold for this kit, the NACA inlet.
The flange on this mold was intentionally given a rough finish, so I would have good bonding with the fuselage interior.
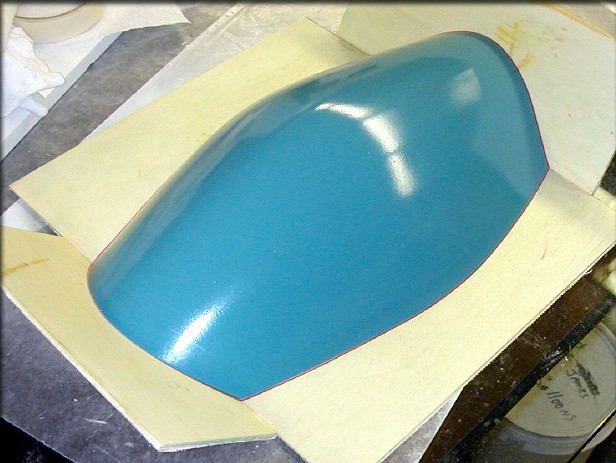
The plug has just been pulled from this mold. It will be trimmed back to the black area, leaving a 3/8" flange for gluing.
If you want to see how this mold was made, click here.
For the fiberglass canopy mold, I decided to take a different approach, in an effort to keep this part extra clean-looking. So...
Imagine making left/right molds for this canopy, as I've done on several past projects. It can be made to work, but there are several issues. First, it's difficult, if not impossible, to get cloth shoved down into each half of a left/right mold, well enough to create the crisp edge. The usual solution is to first run a bead of epoxy/Cabosil into these corners, so that the cloth alone doesn't have to make the edge. The next issue is that, no matter how well you disguise the seam, the fact remains that there is a seam down the middle of the canopy. I thought that if there was going to be a seam, I should put it in a place that's less visible, and make the canopy much easier to lay up, as a bonus.
The parting board setup you see here above will allow us to simply lay cloth into the "bowl" part of the canopy, then lay cloth onto the "floor" part of the mold, and join them normally, like any other mold. A simple bead of filled epoxy will complete the joining, with no "tape" required.
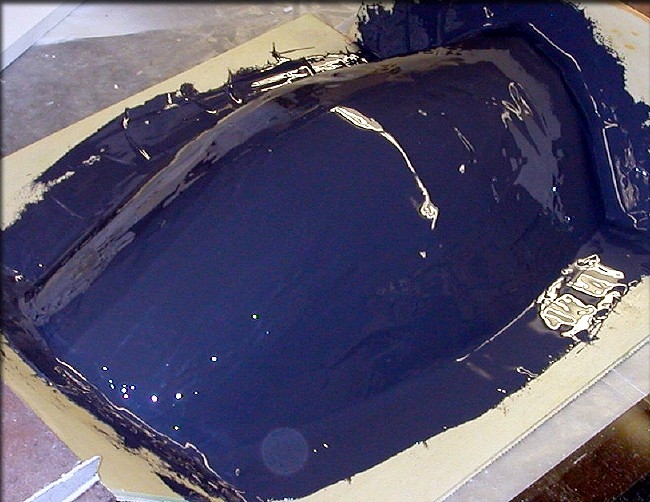
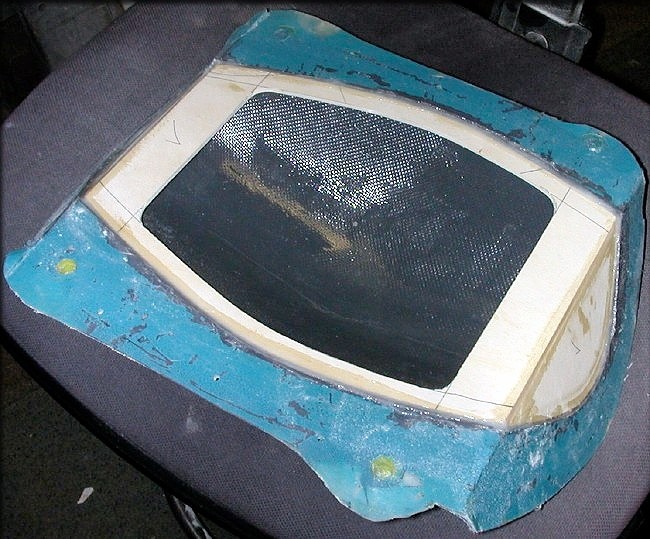
After waxing the canopy plug and parting board, and giving them a coat of PVA, a layer of tooling resin, pigmented black, was added. This was allowed to firm up for about one hour before the next step. Waiting insures that the part won't move around.
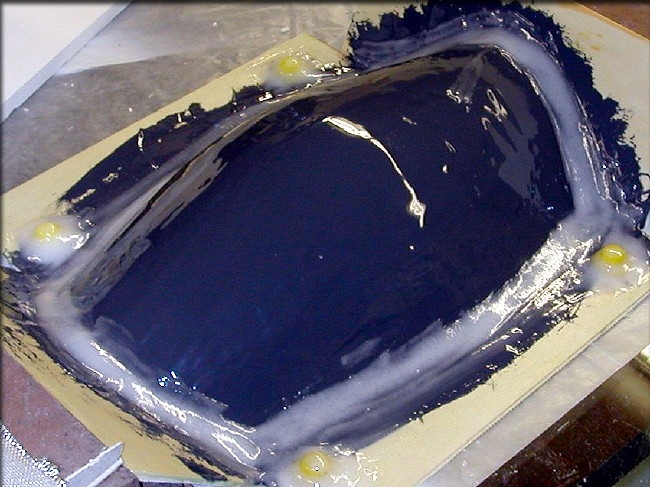
I glued 4 nylon "inserts" to the parting board, to create female alignment holes in this mold half. (the yellow things) Next, a layer of epoxy/cabosil was filleted into all the sharp edges, so the cloth would conform more easily. Again, this was allowed to tack in for about an hour, so that when I added the cloth, it wouldn't move around.
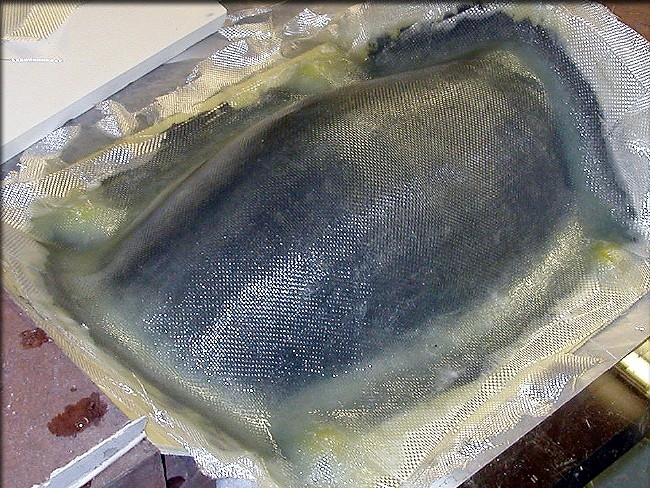
I added 4 layers of 2 oz. cloth, followed by 6 layers of 6 oz. cloth.
This makes a mold that's adequately rigid , without wasting a lot of material. This is a simple, low-stress part.
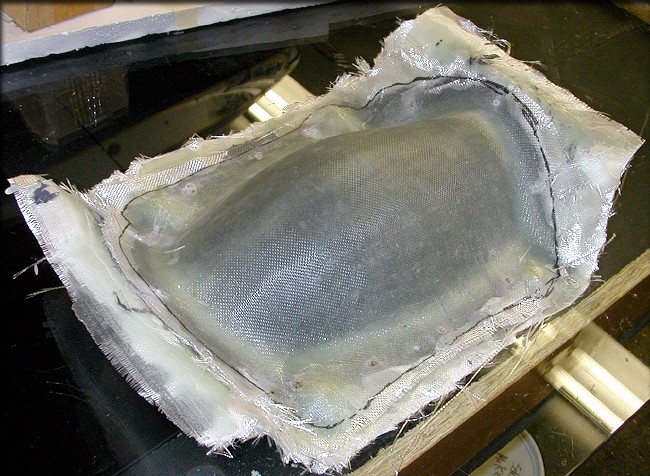
After the first mold half cured, the parting board was removed, and the bottom of the assembly was waxed and PVA'd. There were no sharp edges to fill on the "floor" section, so I simply proceeded with laying up all the cloth. Before attempting to separate these parts, I drilled about a dozen 1/8" holes around the perimeter, to later hold bolts, then trimmed the whole assembly with a band saw, to the black outline marked here.
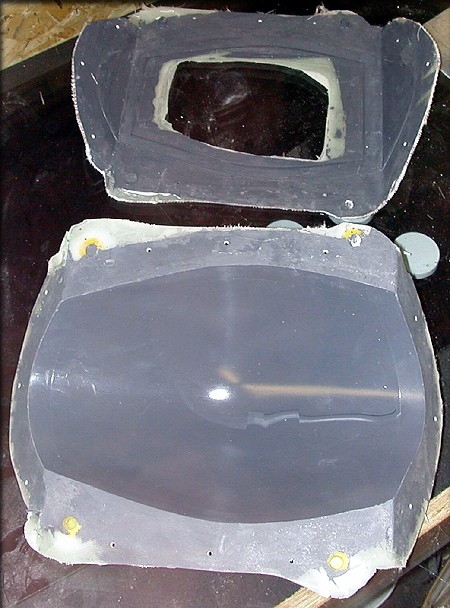
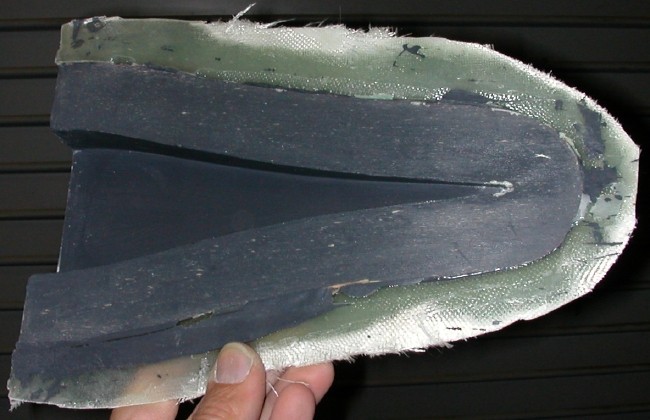
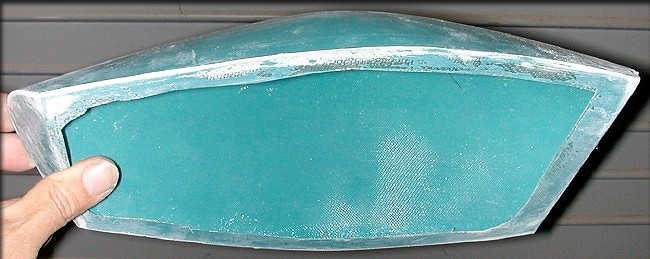
Here are the molds, immediately after pulling the plug, and before cleanup and final trimming.
I left a hole in the floor section for access when joining the molds.
Next, I'll trim the molds to our marked flange lines, and remove all the wax and PVA, before using them.
A small change in production methods makes a much better part...
Ignore the cosemetic aspects of this test canopy. I wanted to see just how far I could push these chemicals, so I did everything wrong, on purpose. This helps us in production, because it proves or disproves our timetable for the various steps. So...
First, I did all of the following steps in 50-degree (F) temperatures, and high (about 70%) humidity. I let PVA pool in the bottom of the canopy, to see if it would cure. When it didn't look like it would, I went ahead and sprayed the paint in the mold, allowing it to also pool in the bottom of the mold. The result was that the paint and PVA combined, (sort of) and even with me trying to swish this around a little, it simply would not cure right. This is proof that you need to wait on these steps.
Next, I started (gently) applying resin to the mold only about 2 hours after painting, which is too early for a proper paint cure. Actually, it looks like I got away with this error, as I didn't see any paint come loose and mix with the resin while I was brushing it. (except at the "pool" in the bottom of the mold)
When I applied the cloth to the "floor" or bottom part of the canopy mold, I did NOT trim it properly to the recessed trim line I created, but just let it hang over the sides. The result of this was fairly serious, The entire canopy floor was actually then "outside" the perimeter at the 3 edges, (front, bottom, and rear) which increased it's size, dimensionally. This made the canopy impossible to fit, because it was simply too tall.
The seam was adequately hidden, so in that regard, this test was a success. The seam was technically right "at" the edge, so some careful sanding of the flashing produced a medium-grade part. This test piece was molded especially lightly, to see what was required, using only 2 layers of 2 oz. cloth, along with a bit of Cabosil to form a fillet around the inside of the seam. It weighs 2 ounces, painted. That's very light. But, it was easily twisted, and when deformed, would either crease, or break the seam at the floor. I decided that this wasn't good enough, and tried a different approach, below. The surface area for this part, excluding the frame, is about 100 square inches.
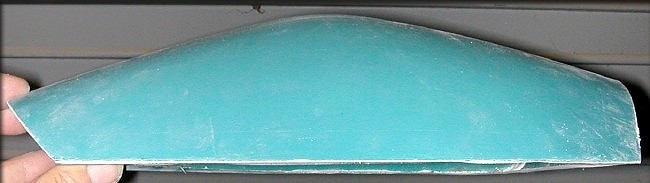
Another canopy was made in the "bowl" or top part of the canopy mold. This time, I didn't bother with the paint, since I know it works. This piece was made with two layers of 2 oz cloth, followed by 1 layer of 6 oz. cloth. And, instead of a molded bottom, I simply made a frame from 1/8" lite ply.

This piece weighs 3 oz., done by hand. I'll eliminate 1 layer of the 2 oz. cloth, if not both, and also reduce the overall resin, when I vacuum bag this part in production. Even without creating more lightening holes, this part will be as light as it's predecessor, but MUCH stronger. This piece is extremely rigid, and cannot be twisted until a severe force strong enough to break it, is applied.
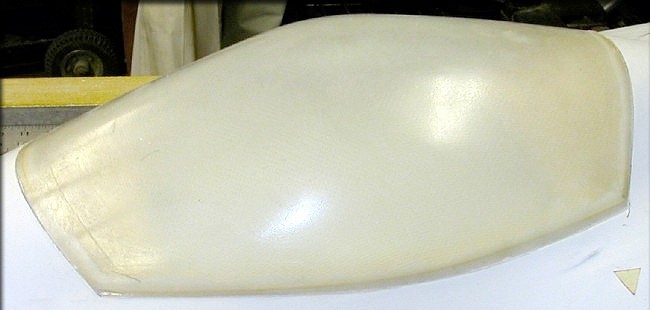
The other bonus is that since the "seam" is now completely inside the molded part there is NO seam visible. I can always use the bottom canopy mold as a paper weight.
Click the "Construction 06" link below to continue...
- Design
- Development
- Simulator Tests
- Construction 01
- Construction 02
- Construction 03
- Construction 04
- Construction 05
- Construction 06
- Construction 07
- Construction 08
- Construction 09
- Construction 10